Update: We’ve added a new, simpler integration option, check out this short video:
In this blog post we show how to implement advanced ajax file uploader in just 5 minutes using PHP.
Example 1: Upload files for some context (order, user etc.) | 5 steps
- Sign in app.planeupload.com (it’s free), connect your cloud
- Go to API section, and create a new API Key
- Click “Open docs” button, then “/api/provideButton” method, then click “PHP” in code examples, and copy the code:
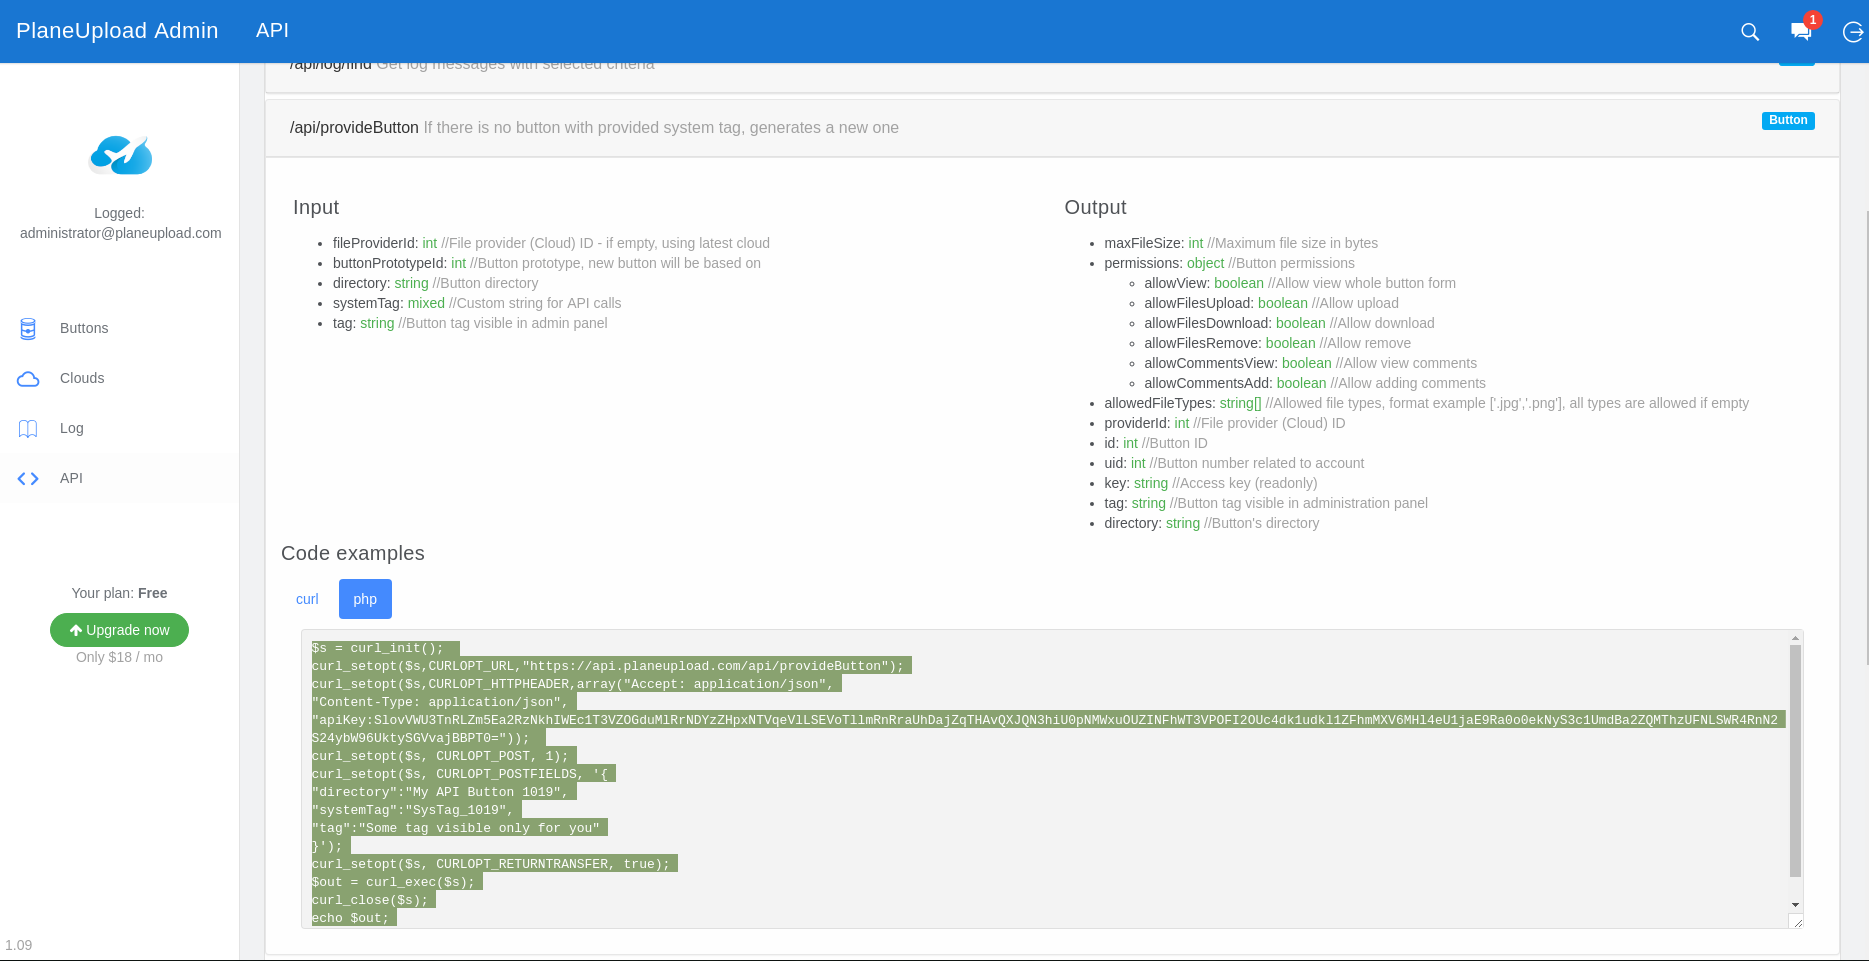
- Now open your favourite editor, and paste the code. Replace systemTag (line 18 from screen) and directory (line 17) to your context, eg. order ID. Then get installationCodeUrl property from JSON result, get it’s contents and render (lines 28 and 31). Result should look like this:
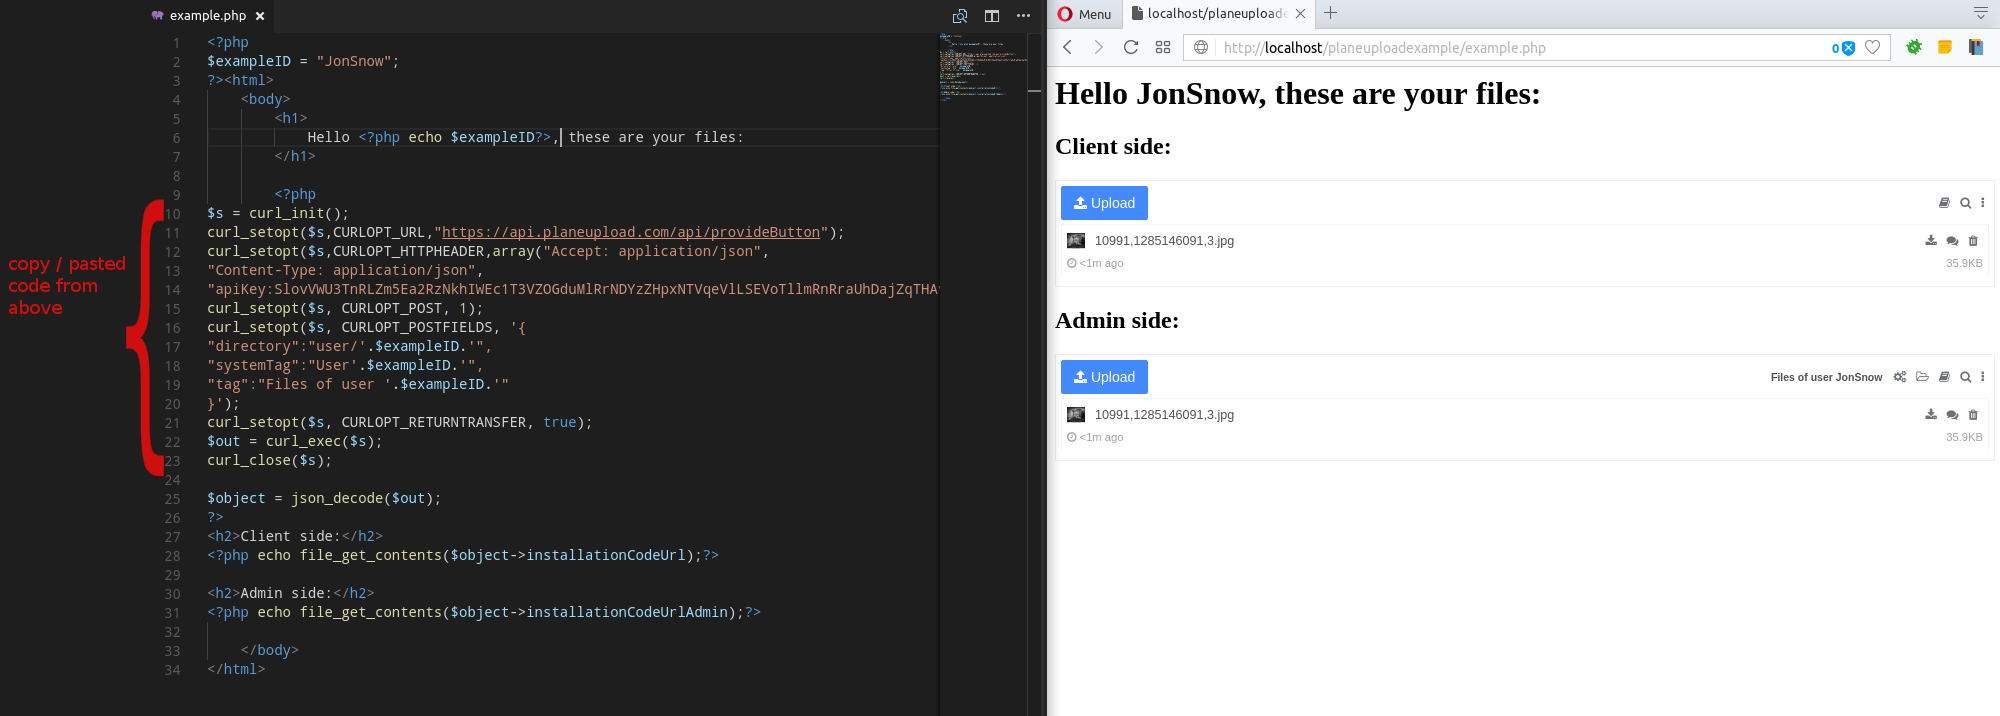
- That’s it! Don’t forget to check out files in your PlaneUpload account and on your cloud that you’ve connected.
Files used in this example:
Example 2: Upload files as attachments in a form | 7 steps
- Sign in app.planeupload.com it’s free. Then connect your cloud.
- Click “Add new button”, and go to “Installation code” -> “Custom form (attachment mode)” tab, and copy the code to clipboard:
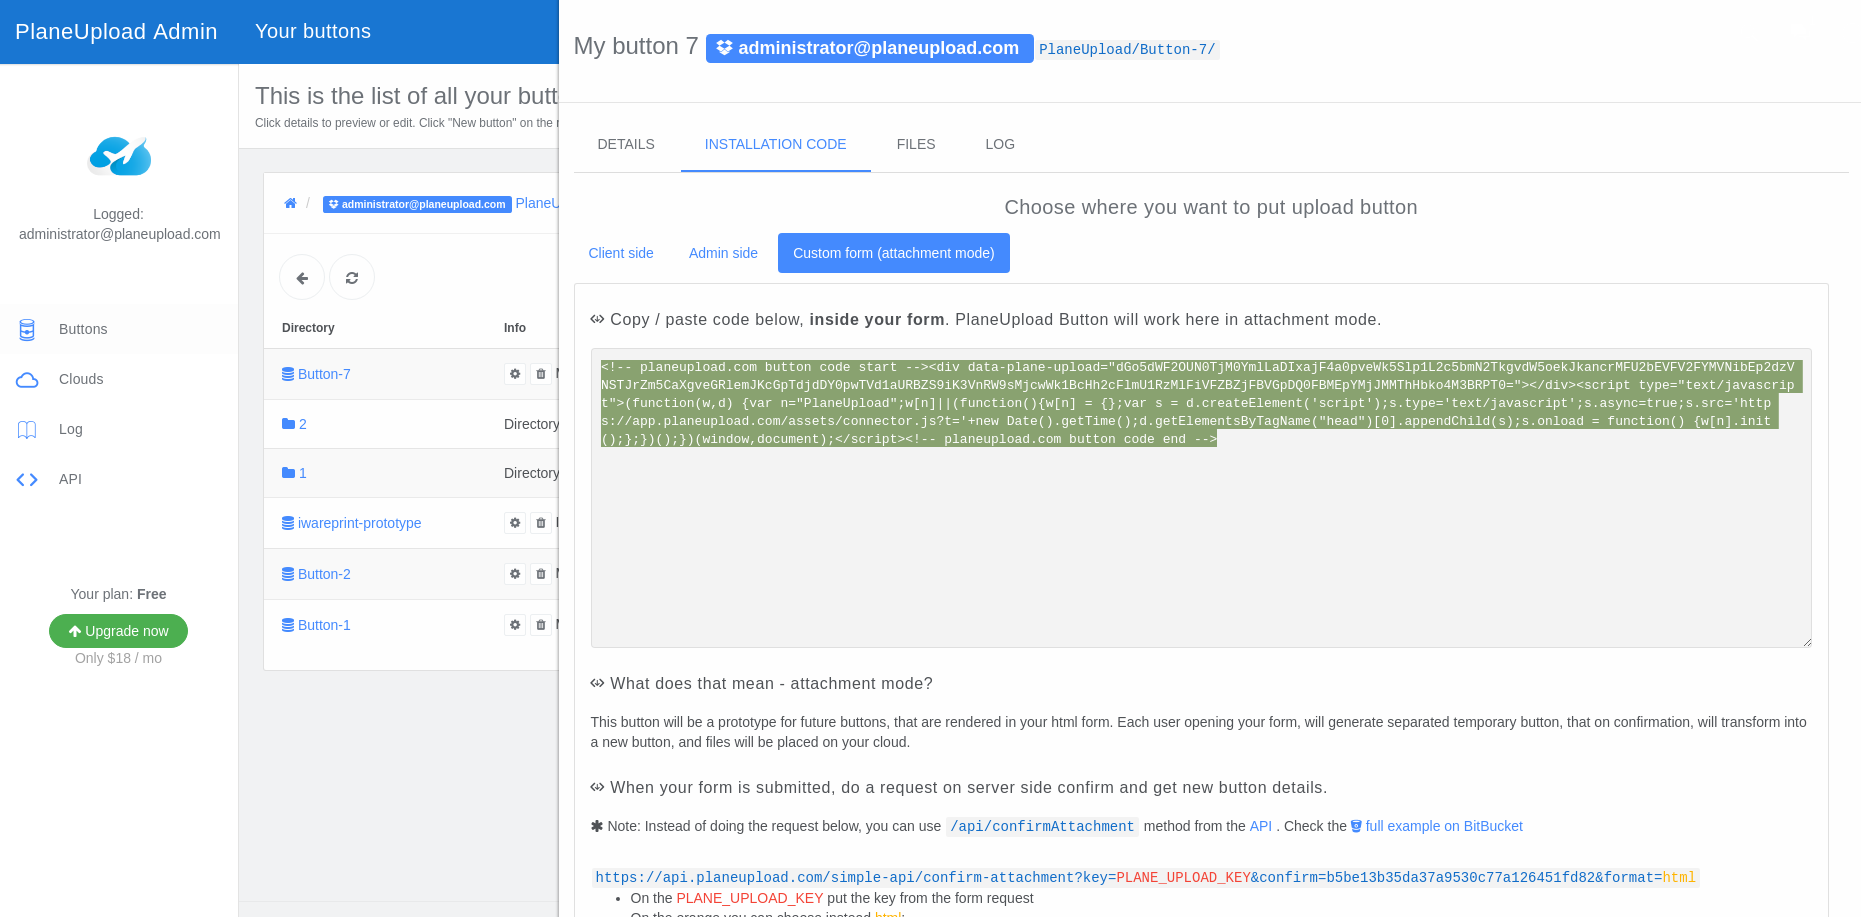 * Note: This button will be a prototype for next buttons, which will have settings copied.
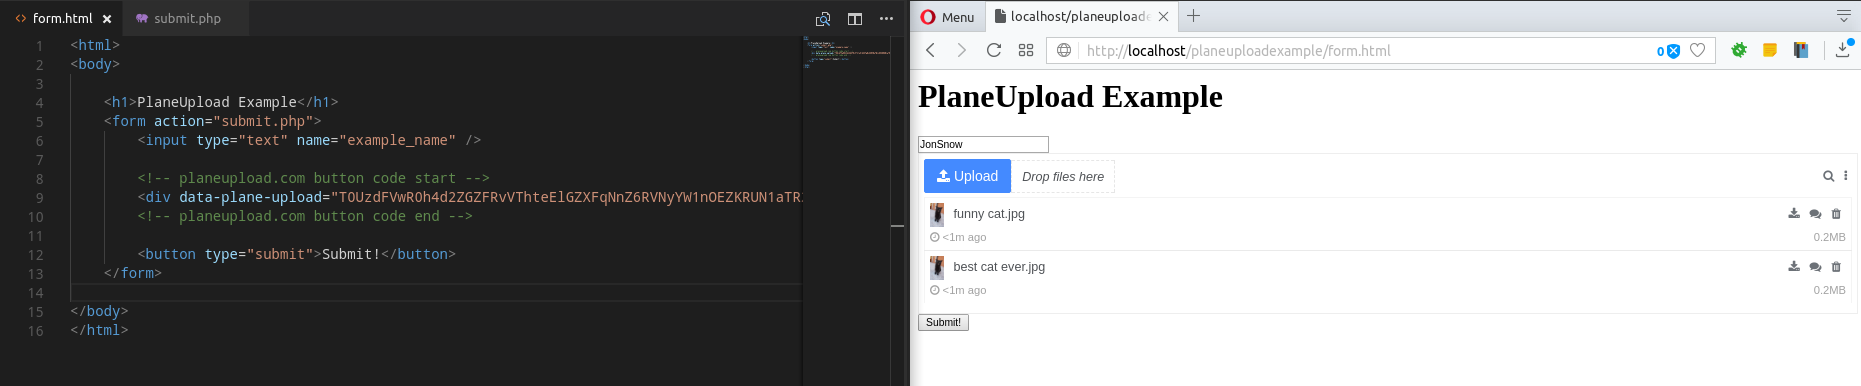
 - Now open your editor, and paste the code inside your <form> tag in html file like this:
- Go to PlaneUpload panel -> API section, and add a new API Key
- Click “Open docs” -> then /api/confirmAttachment section, then copy the PHP code:
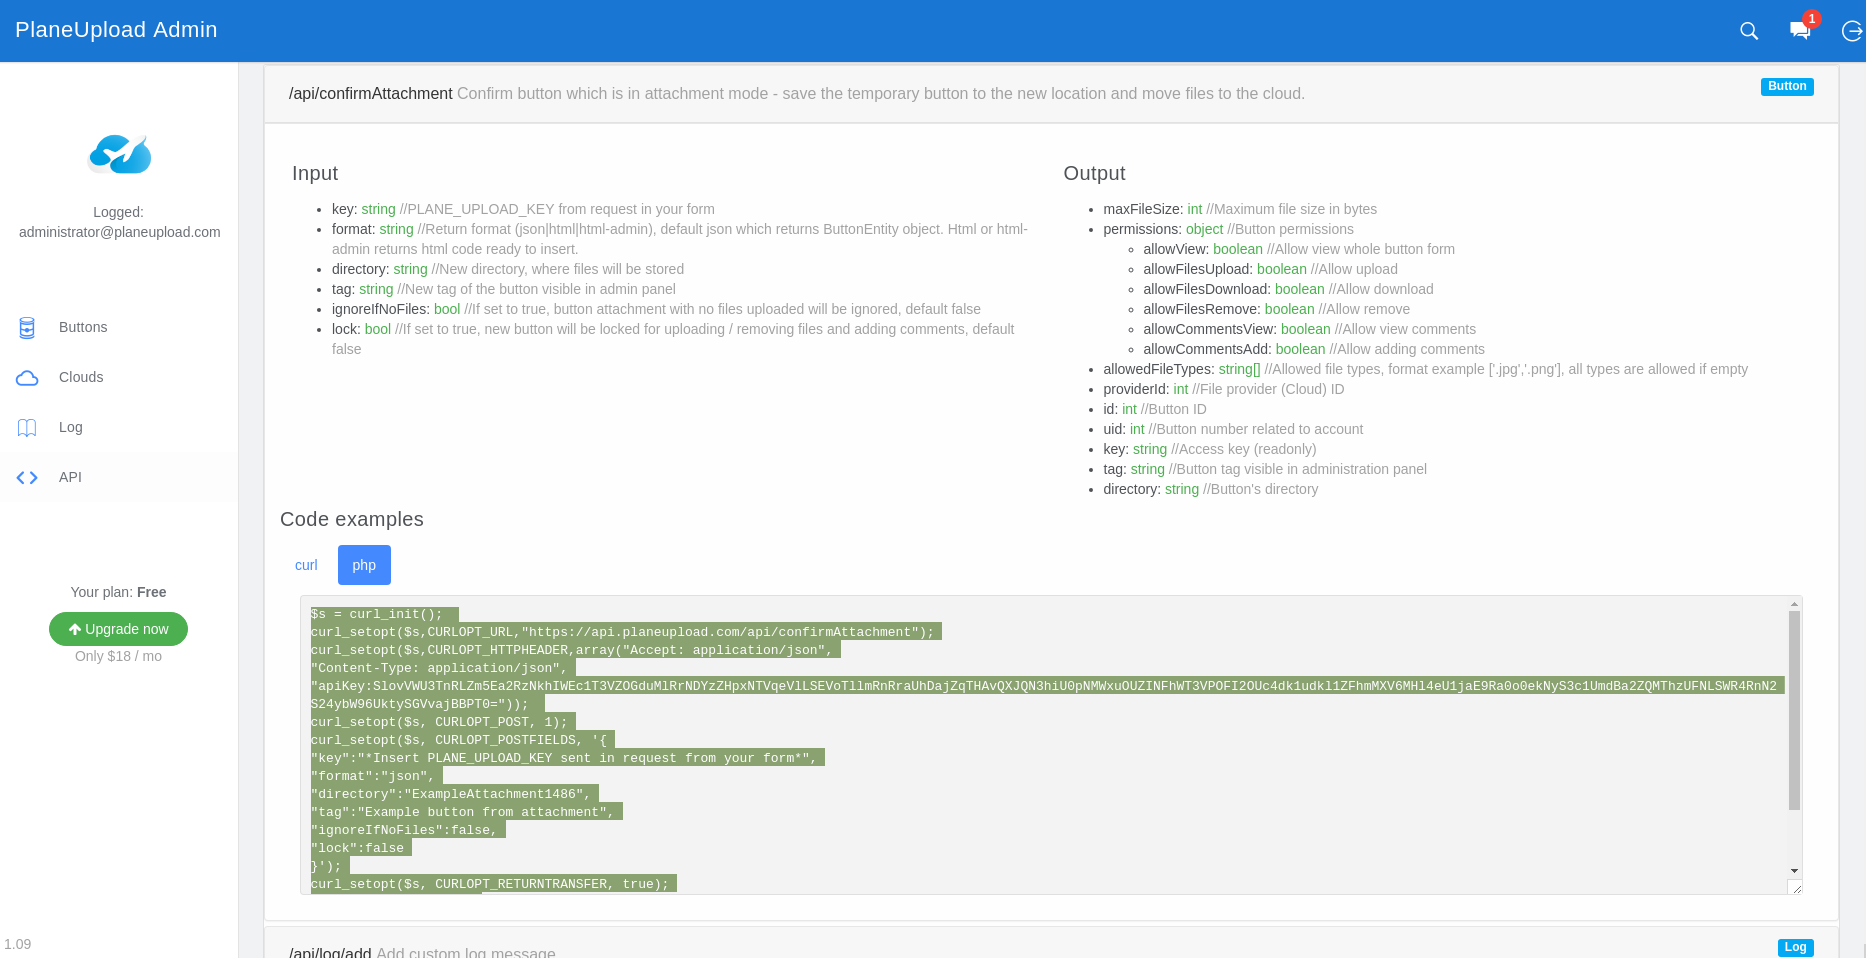
- Paste the code to submit.php file, and change “key” parameter to $_REQUEST[“PLANE_UPLOAD_KEY”] like we did on line 15. Then get installationCodeUrl property from JSON result, and render it’s contents (lines 29 and 32), so the result should look like this:
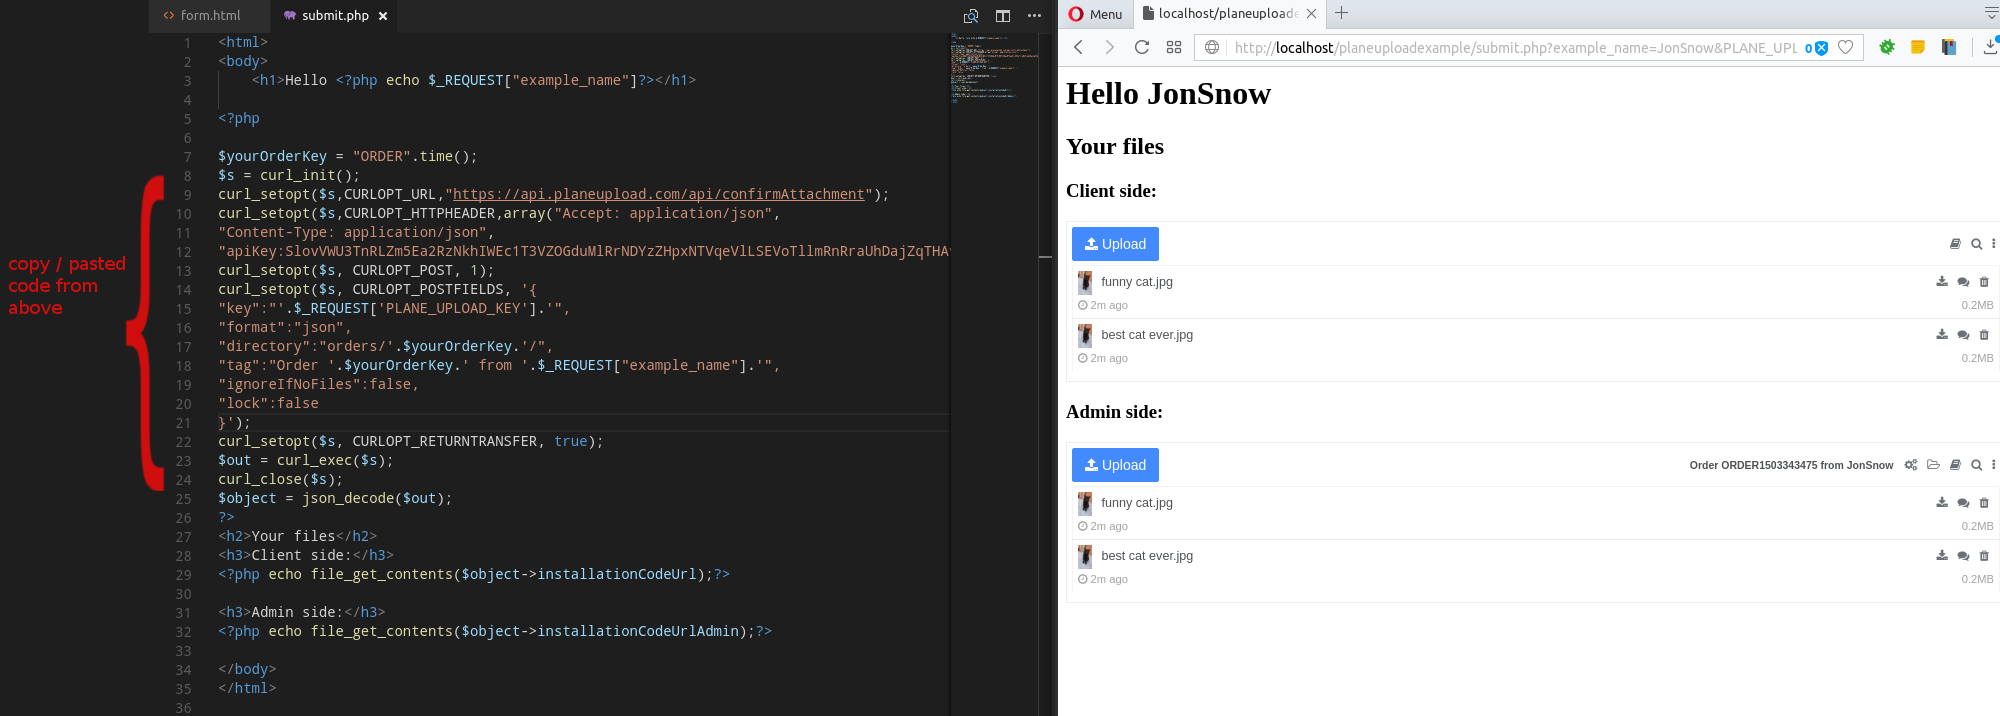 * Note: We’ve also changed “directory” parameter, so it is different, every time form is submitted.
 - You are all set! Now, when form is submitted, a new button is generated on your PlaneUpload account, and files are sent to your cloud.
Files used in this example:
Another example on BitBucket