Amazon S3 integration

As many our users have requested, we’ve added AWS S3 cloud support into our application. Now you can use it in your PlaneUpload account for free!

(Note: If you’re not familiar what PlaneUpload is, check out our About page, there is a 1-min explaining video!)

First, you’ll need AWS S3 credentials, which we’ll explain at first by adding AWS IAM User. Next we’ll show you, how to setup the cloud in your PlaneUpload account.

1/2. How to get AWS S3 credentials?

  1. Naviage to https://aws.amazon.com/s3/ and click “Sign In to the Console” button. After you’re logged in, click on your account name on the top-right corner, and choose “My Security Credentials“. If you’ll get a popup, choose “Get Started with IAM Users“. If not, choose “Users” menu link, from the left sidebar.
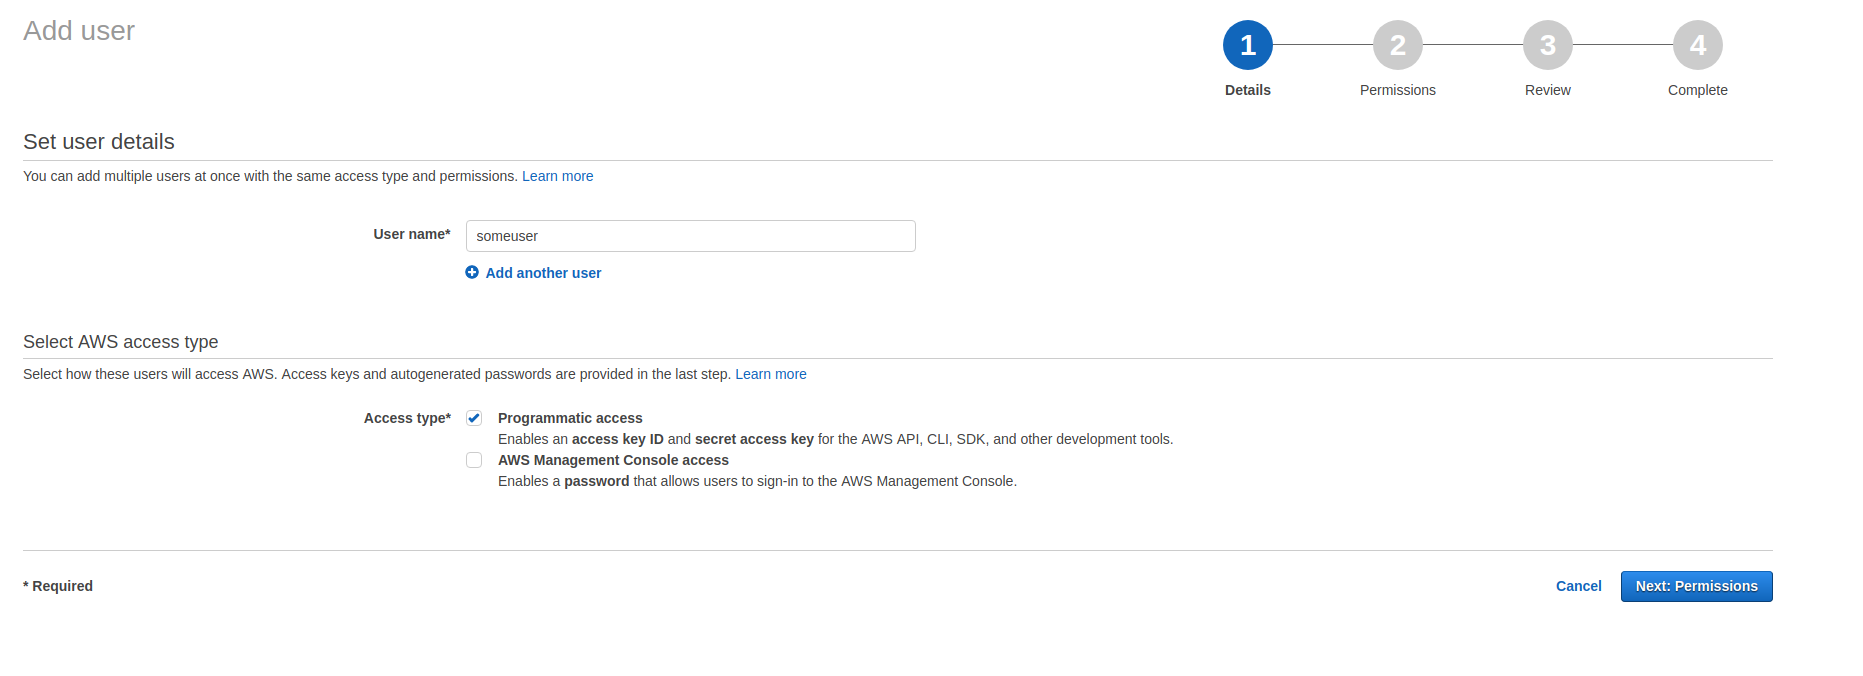
  2. Click “Add user” blue button, that will redirect you to the wizard. Provide some user name, and select “Programmatic access“. Then click “Next”aws add user step 1
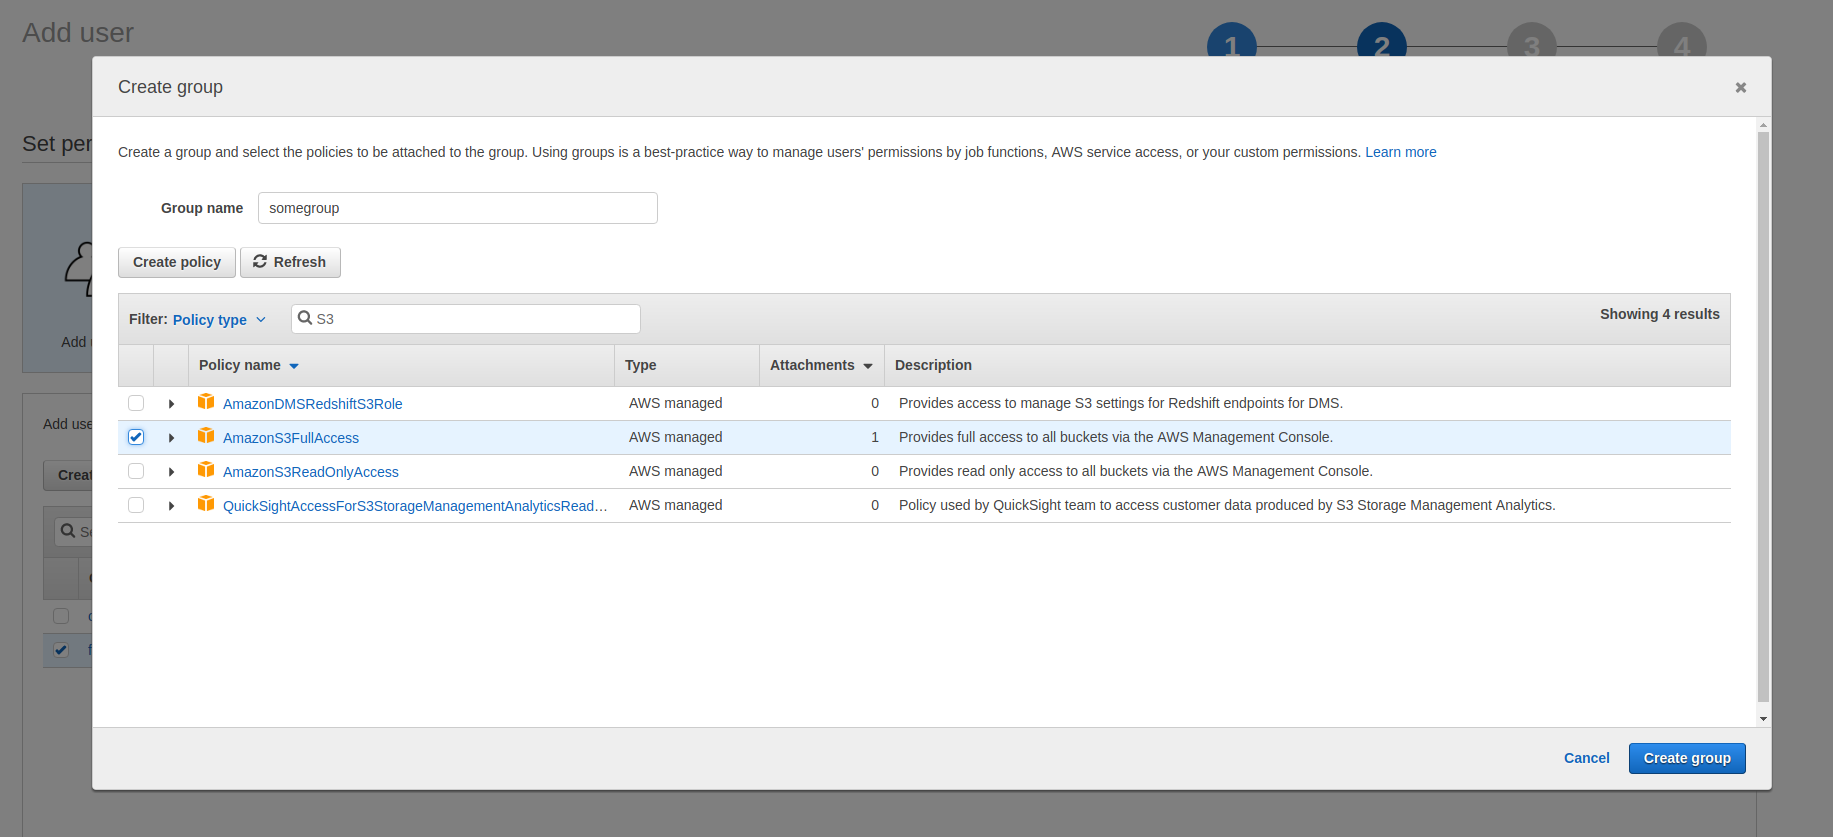
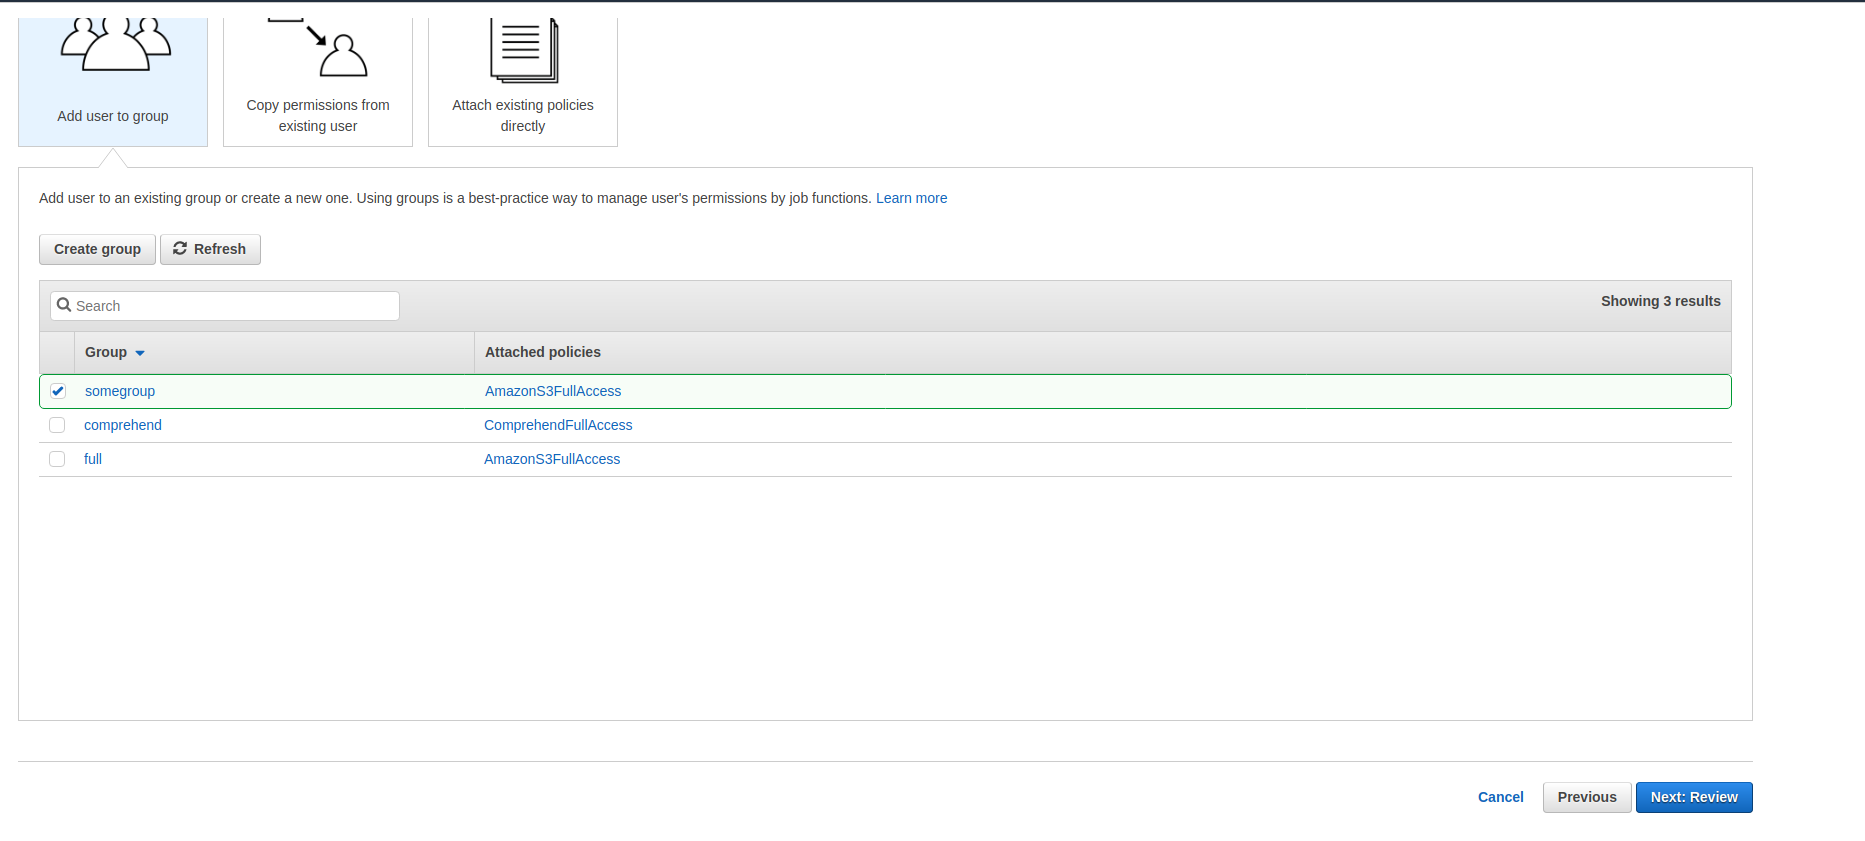
  3. On the next step, you’ll need to setup permissions to “AmazonS3FullAccess” for the new user. You can do that by clicking “Create group”, providing some group name, and choosing AmazonS3FullAccess from the list and saving by clicking on “Create group”.AWS S3 create group
  4. Choose your previously created group checkbox, and click on “Next: Review”AWS assing group to the new user
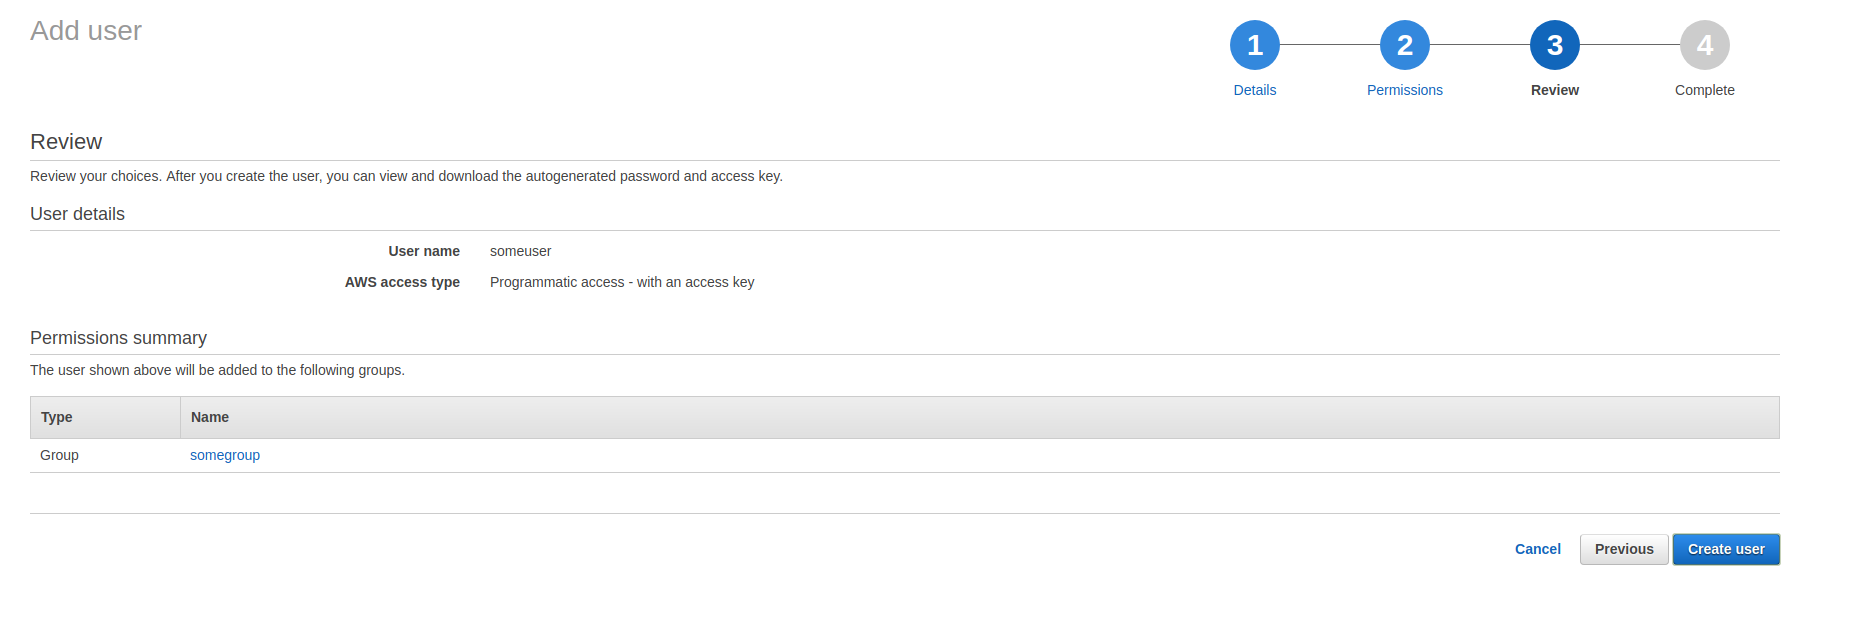
  5. If everything looks right, confirm by clicking on “Create user” button. aws create user review
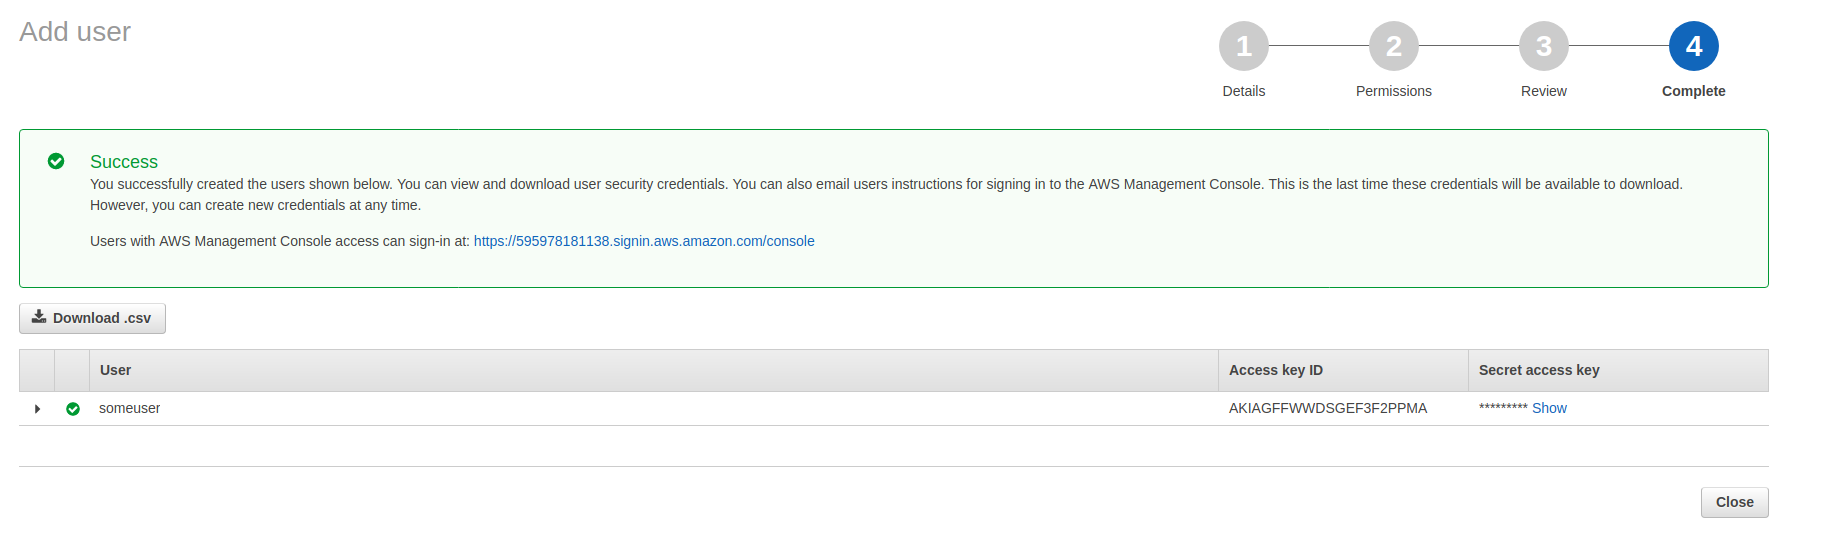
  6. Now your new user is created, there is Access key ID, and Secret access key, that you’ll need to use in the second part of this tutorial. aws created account

2/2. How to add AWS S3 cloud in PlaneUpload panel?

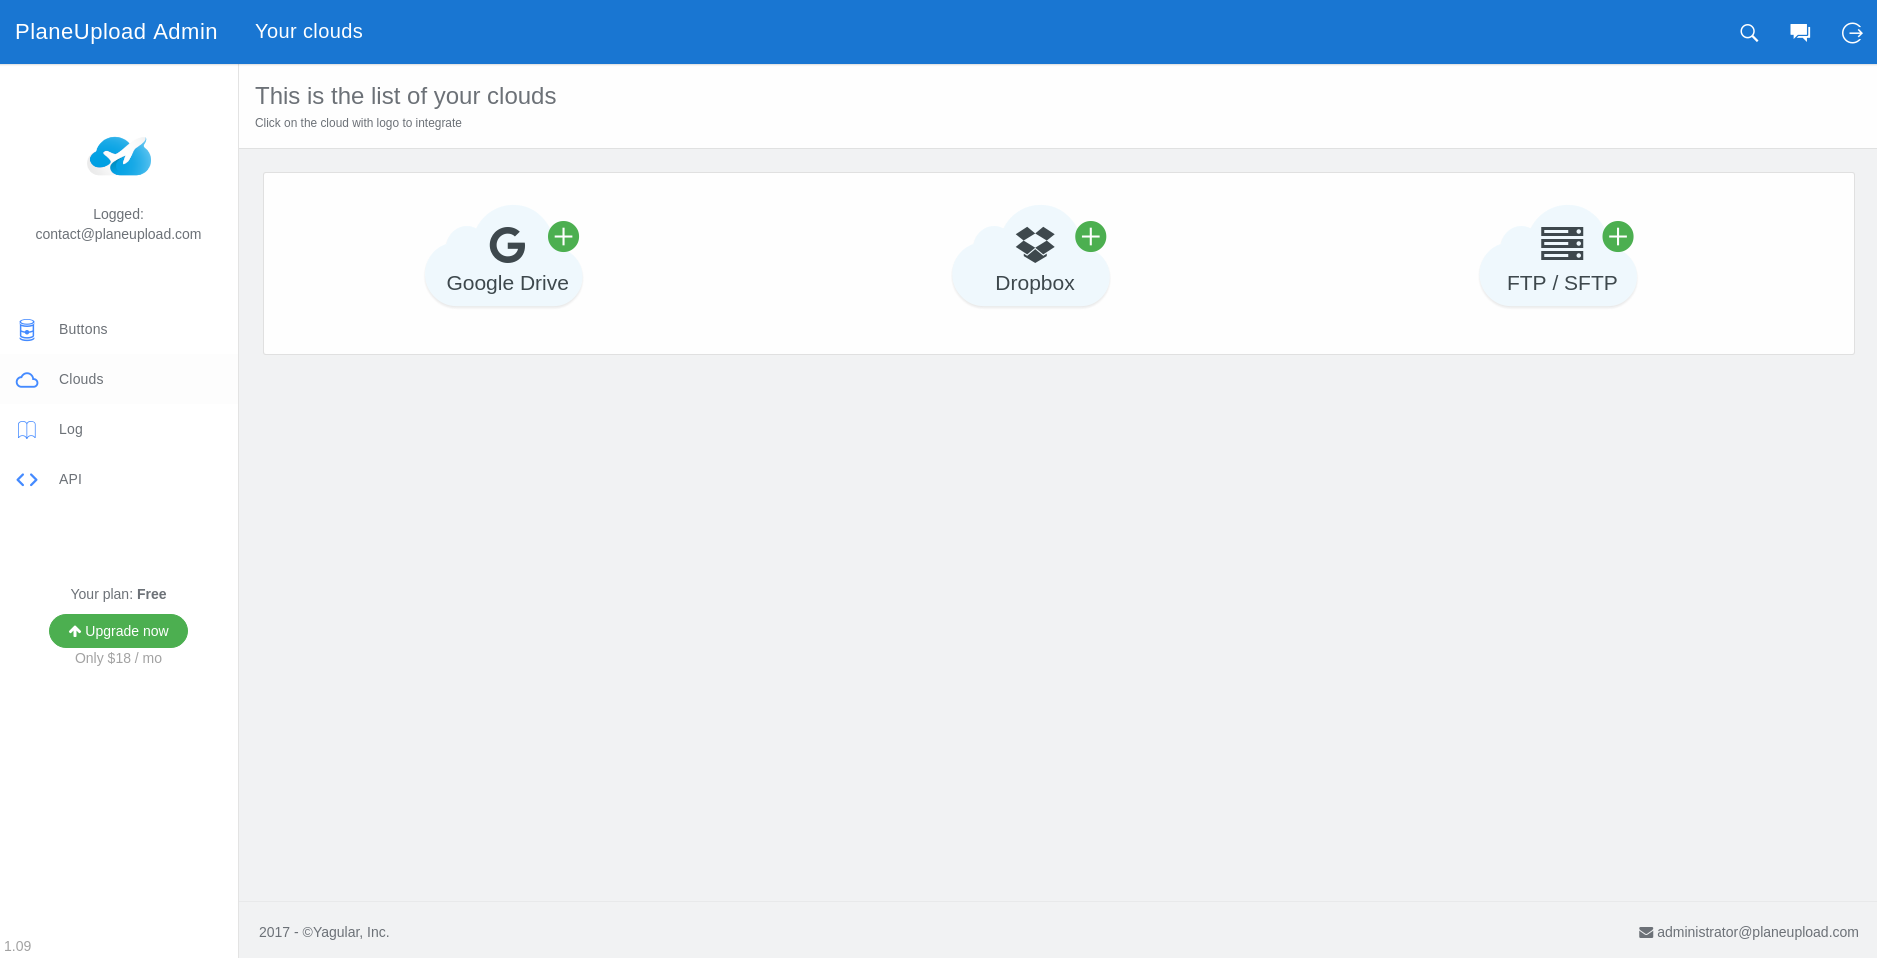
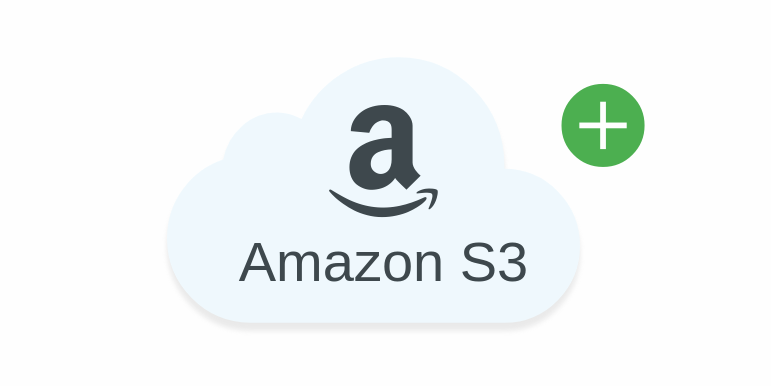
  1. Go to your admin panel at https://app.planeupload.com, and navigate to “Clouds” menu item on the left sidebar. There you will see a new cloud-like button, next to the other buttons. It will look like this: planeupload aws s3 button
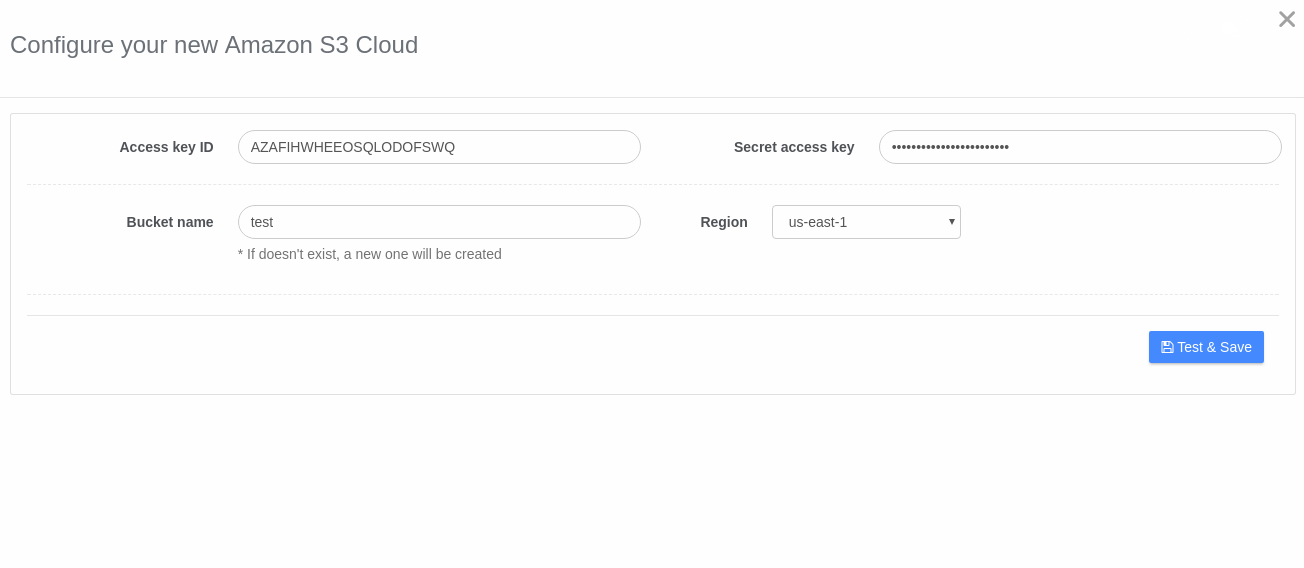
  2. After clicking the button, you’ll see AWS credentials dialog, where you can put AWS Access key ID, Secret access key, region and your bucket name (if it doesn’t exist, a new bucket with that name will be created). planeupload AWS S3 credentials
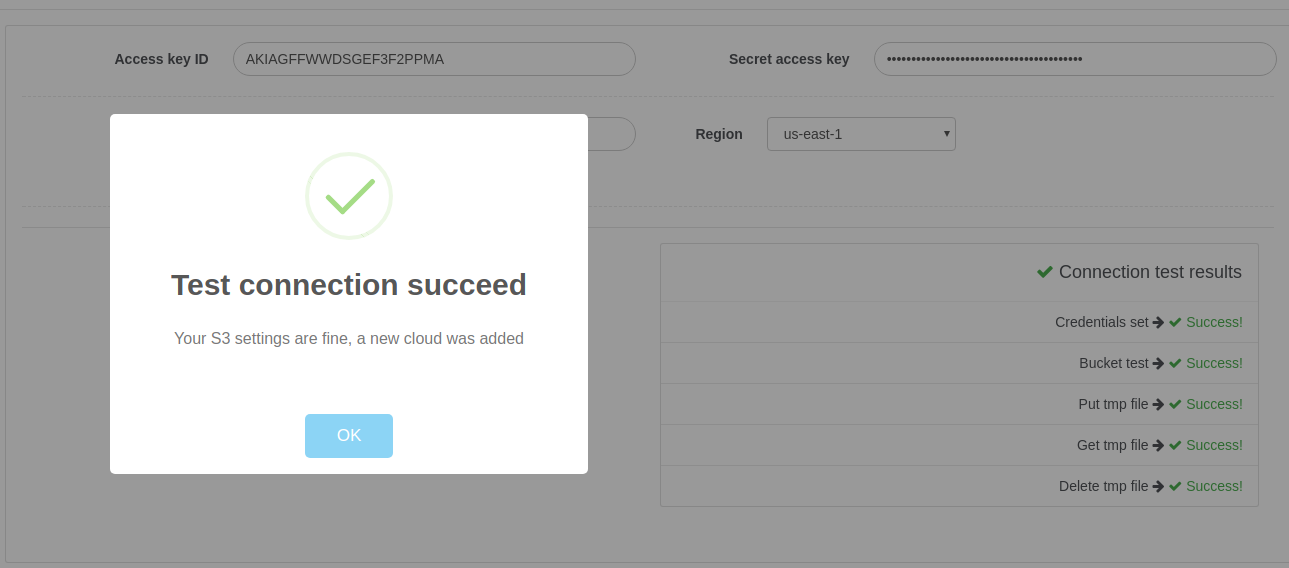
After clicking “Test & Save” button, PlaneUpload will check your configuration, and if the result is positive, a new record will appear on your cloud list.

planeupload - AWS S3 cloud addedd

3. That’s all. You can use your new created PlaneUpload cloud by creating a new button, or selecting the cloud while editing existing button. If you have any questions, contact us on contact@planeupload.com.


Advanced ajax file uploader in 5 min | PHP

Update: We’ve added a new, simpler integration option, check out this short video:


In this blog post we show how to implement advanced ajax file uploader in just 5 minutes using PHP.

Example 1: Upload files for some context (order, user etc.) | 5 steps

  1. Sign in app.planeupload.com (it’s free), connect your cloud
  2. Go to API section, and create a new API Key
  3. Click “Open docs” button, then “/api/provideButton” method, then click “PHP” in code examples, and copy the code:PlaneUpload Admin Panel - copy API example code
  4. Now open your favourite editor, and paste the code. Replace systemTag (line 18 from screen) and directory (line 17) to your context, eg. order ID. Then get installationCodeUrl property from JSON result, get it’s contents and render (lines 28 and 31). Result should look like this:Code screen
  5. That’s it! Don’t forget to check out files in your PlaneUpload account and on your cloud that you’ve connected.

Files used in this example:


Example 2: Upload files as attachments in a form | 7 steps

  1. Sign in app.planeupload.com it’s free. Then connect your cloud.
  2. Click “Add new button”, and go to “Installation code” -> “Custom form (attachment mode)” tab, and copy the code to clipboard:PlaneUpload Admin Panel - Installation code for attachment mode* Note: This button will be a prototype for next buttons, which will have settings copied.
  3. Now open your editor, and paste the code inside your <form> tag in html file like this:Attachment PHP code, and upload button preview
  4. Go to PlaneUpload panel -> API section, and add a new API Key
  5. Click “Open docs” -> then /api/confirmAttachment section, then copy the PHP code:PlaneUpload confirm attachment code
  6. Paste the code to submit.php file, and change “key” parameter to $_REQUEST[“PLANE_UPLOAD_KEY”] like we did on line 15. Then get installationCodeUrl property from JSON result, and render it’s contents (lines 29 and 32), so the result should look like this:Code Example* Note: We’ve also changed “directory” parameter, so it is different, every time form is submitted. 
  7. You are all set! Now, when form is submitted, a new button is generated on your PlaneUpload account, and files are sent to your cloud.

Files used in this example:

Another example on BitBucket

About PlaneUpload – file upload widget

Update: We’ve prepared a short 1-min explaining video, check it out:


PlaneUpload is a file upload widget, that you can install in your web application for free. Files are stored on your Google Drive, Dropbox, Amazon S3 or (S)FTP account. Works with all programming languages, and is easy to install.


PlaneUpload button presentation - animated gif

What problems does it solve?

Implementing file uploader was always tricky. Struggling with all these problems and features may take a lot of time. We’ve solved them all, so you wont need to waste your time on this. What are these problems / features that we’ve solved?

  • Miniatures – we generate miniatures for graphic files automatically
  • Multiple uploads – upload many files at the same time
  • Drag & Drop – drag files from your desktop right to the uploader
  • Progress bars – while uploading, each file shows it’s status. You can cancel upload, anytime you want
  • Zip compressing – download all files at once compressed into single zip file
  • Allowed file extensions – select which extensions you like, your users will be able to upload
  • Maximum file size – simply set value of maximum file size, we will check it before the file even start to upload
  • Comments – you and your users can comment files, on App Panel you get notifications, about new unread messages
  • Browser compatibility – all these features work in all modern browsers
  • Real-time synchronization – all operations are synchronized immediately

PlaneUpload Admin Panel


What do I get?

Advanced ajax file uploader that is integrated with your cloud. Forget about upload errors or your application being hacked. With our App Panel, you have full control over your files. All actions are logged, you know exactly when someone upload, download, delete or comment.

Admin Panel - Logs


How do I get started?

Go to planeupload.com and click “APP LOGIN” button in top-right corner. Registration is with Google or Facebook account and takes less than 1 minute. It’s free.

Then connect your cloud by clicking the cloud icon, and grant permissions to PlaneUpload Application – also less than 1 minute.

Admin Panel - Connecting cloud

Add a button, upload some files – all of them you can also see in your cloud account. Check out our API for simple – copy/paste installation examples. Currently we have ready-to-use examples for Curl and PHP, but it’s very easy to convert it to any other language.

Admin Panel - API